Stotz Conversion & Shotting Patterns for Pole Floats — Complete Clubnest Guide
Introduction
Pole fishing is all about balance and presentation. Getting your float perfectly shotted is the difference between a confident bite and a missed opportunity. This guide explains everything you need to know about Stotz conversions, shotting patterns, and float design — helping you create rigs that perform flawlessly in any venue or condition.
You’ll learn when to use bulk, strung, or combination shotting; how different float bodies and stems behave; and how to choose the perfect setup for canals, commercials, and rivers. Whether you’re a beginner learning the basics or an experienced match angler fine-tuning your rigs, this guide will give you a reliable reference for every situation.
Understanding Shotting and Stotz
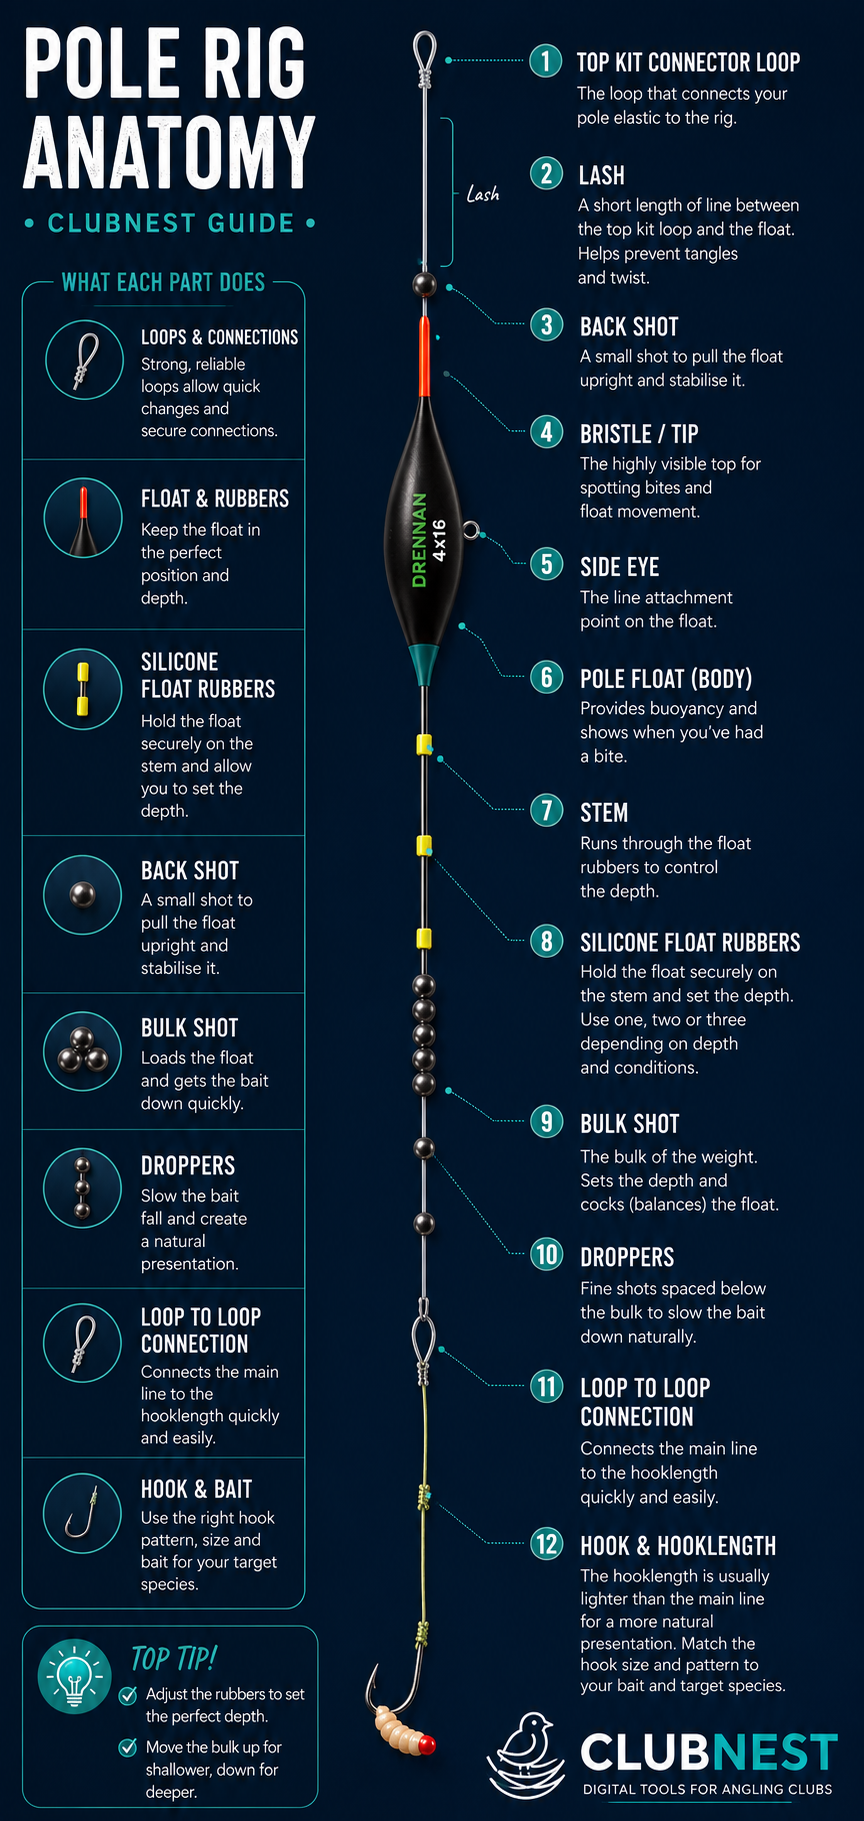
When you’re pole fishing, the way you distribute weight along your line controls how the bait behaves. Each shot or Stotz added to your rig changes how fast your float settles, how naturally your bait falls, and how sensitive your rig becomes to tiny bites.
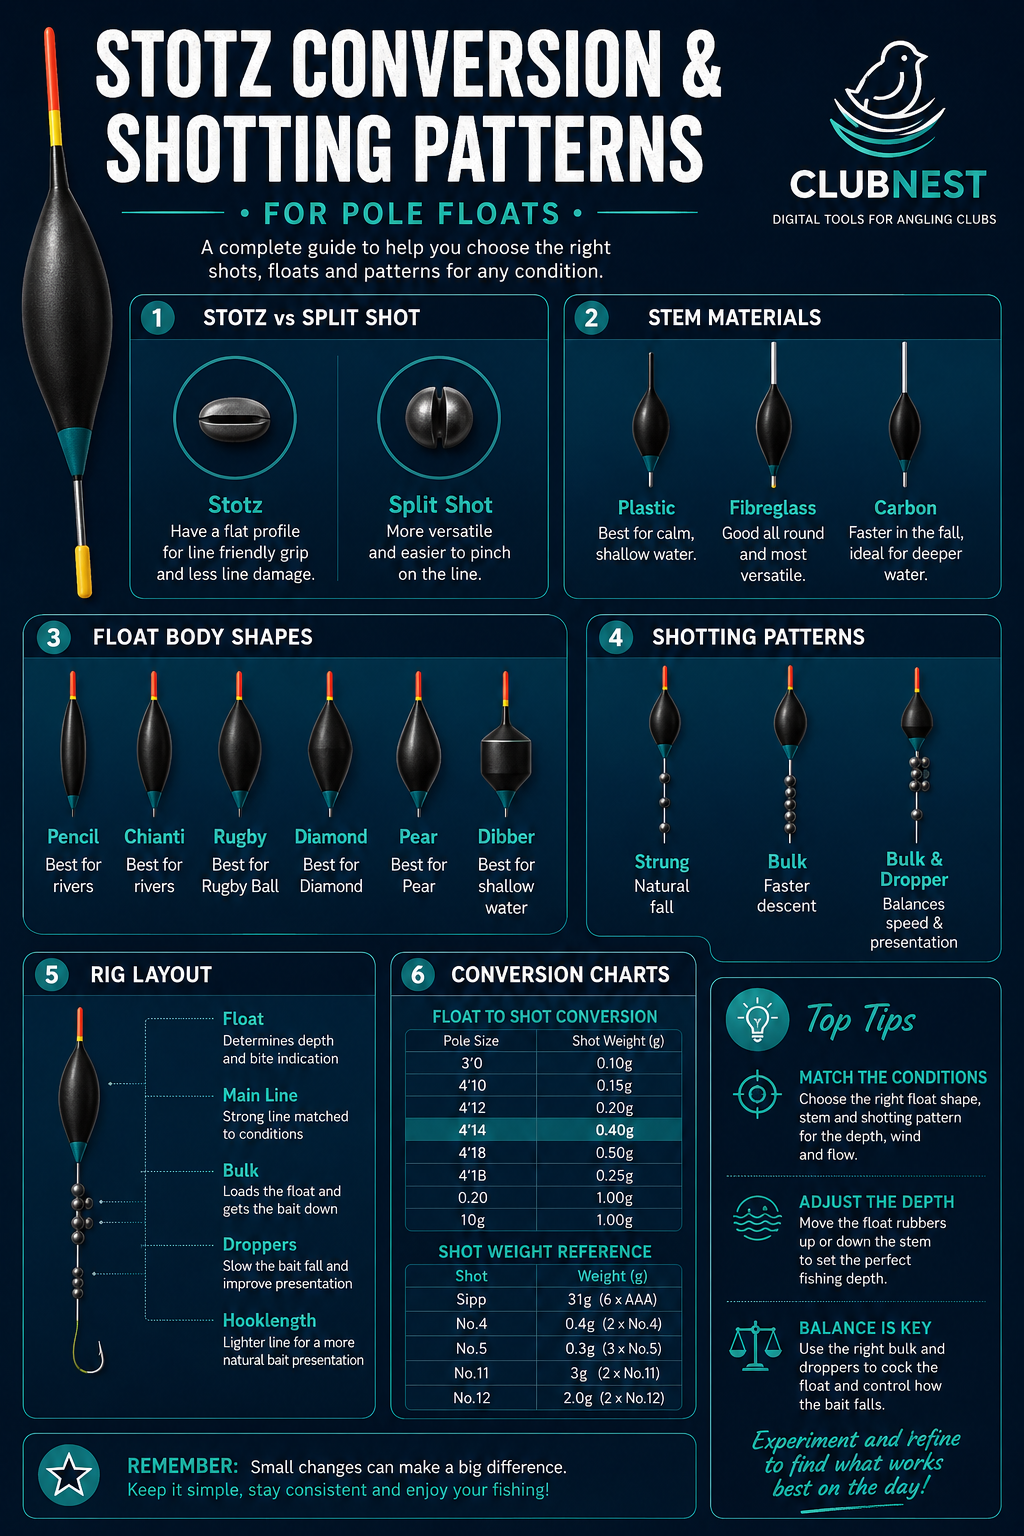
Stotz are modern, precision-cut alternatives to traditional split shot. They’re flatter, grip line more securely, and can be moved without damaging your rig. Designed primarily for pole fishing, they make consistent rigs easier to tie and adjust.
Stotz vs Traditional Split Shot
Feature | Stotz | Traditional Split Shot
Shape | Flat-sided oval | Round or pear-shaped
Line Grip | Non-slip, gentle on line | Can pinch or weaken line
Consistency | Uniform weight | Slight variation between sizes
Ease of Use | Opens & closes easily | Requires pliers or force
Best Use | Pole rigs, soft lines | Heavier running line rigs
Stotz are especially useful with today’s fine diameters — 0.08–0.14mm — because they hold position securely without flattening the line.
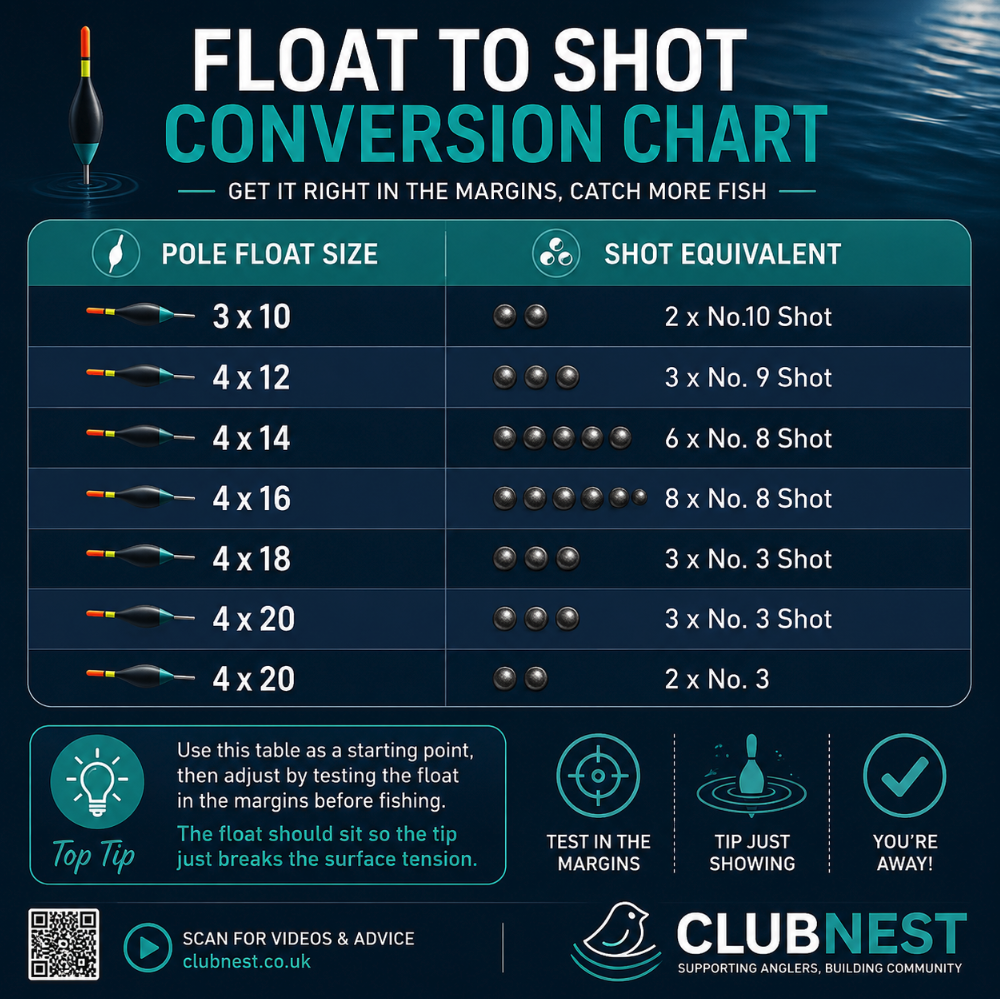
Use this table as a starting point, then adjust by testing the float in the margins before fishing. The float should sit so the tip just breaks the surface tension.
Hook matched to bait size (size 18–14 for most coarse fishing)
When and Why to Change Your Shotting Pattern
Situation | Best Pattern | Why
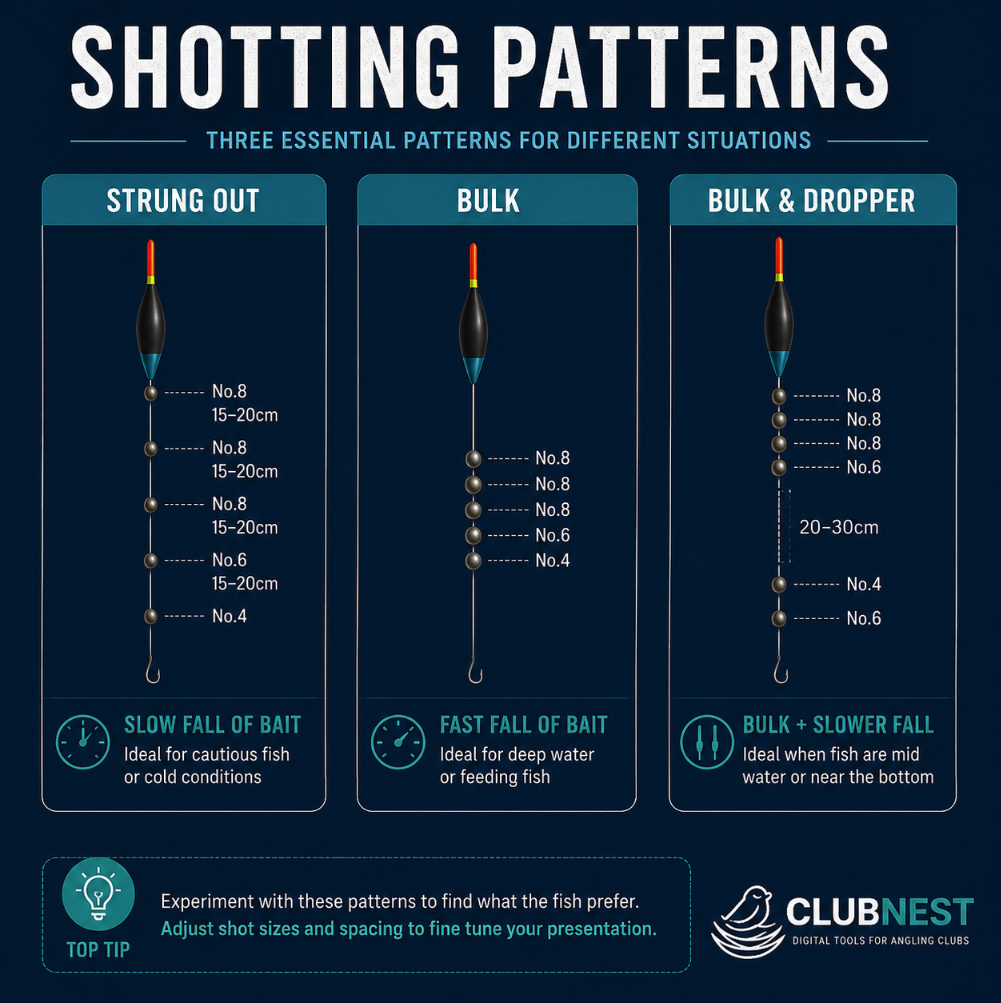
Fish feeding mid-water | Strung-out | Slower fall keeps bait in strike zone
Fish hugging the bottom | Bulk | Gets bait down quickly and stable
Cold water / winter | Bulk + Dropper | Slower final fall for shy bites
Deep venues | Bulk | Rapid descent to feeding depth
Wind or tow | Bulk + Wire stem | Cuts through surface drift
Shallow margins | Bulk short line | Holds bait tight to feature
Use Stotz for consistent, line-friendly weight placement.
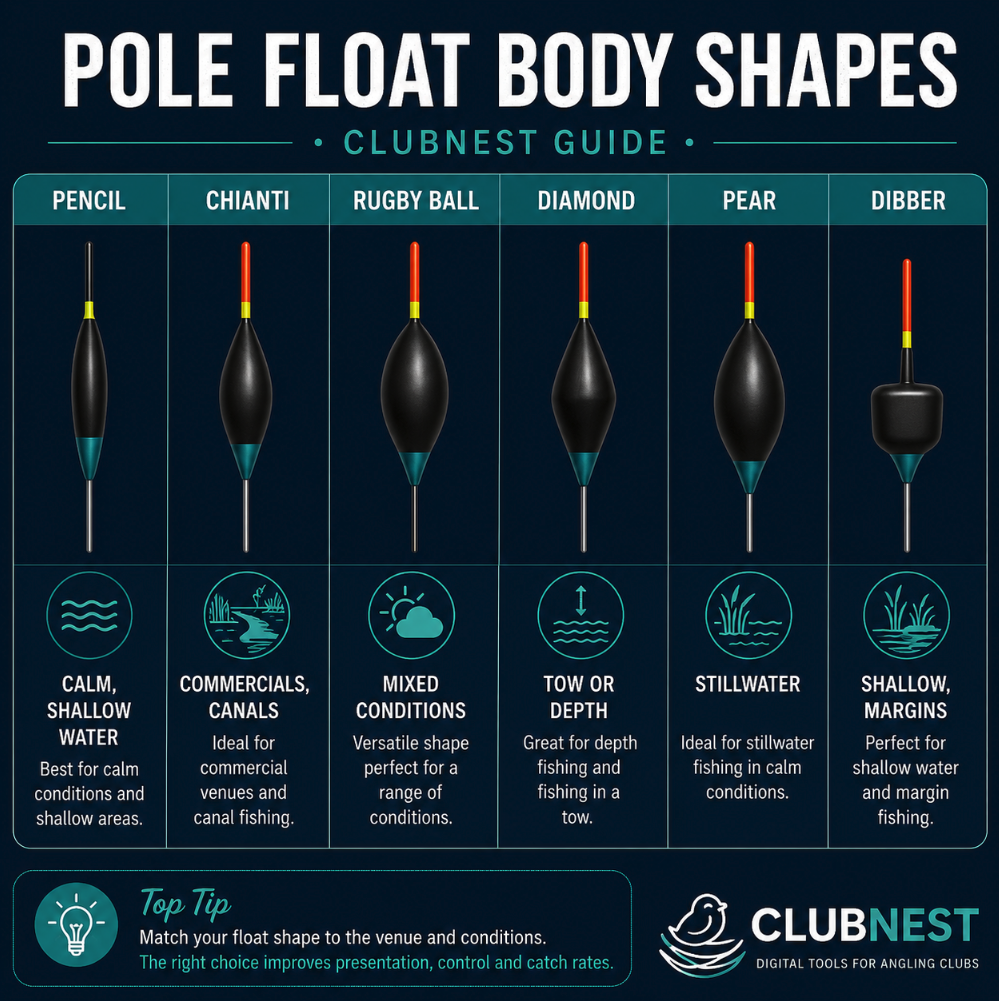
Match float size to water depth and conditions.
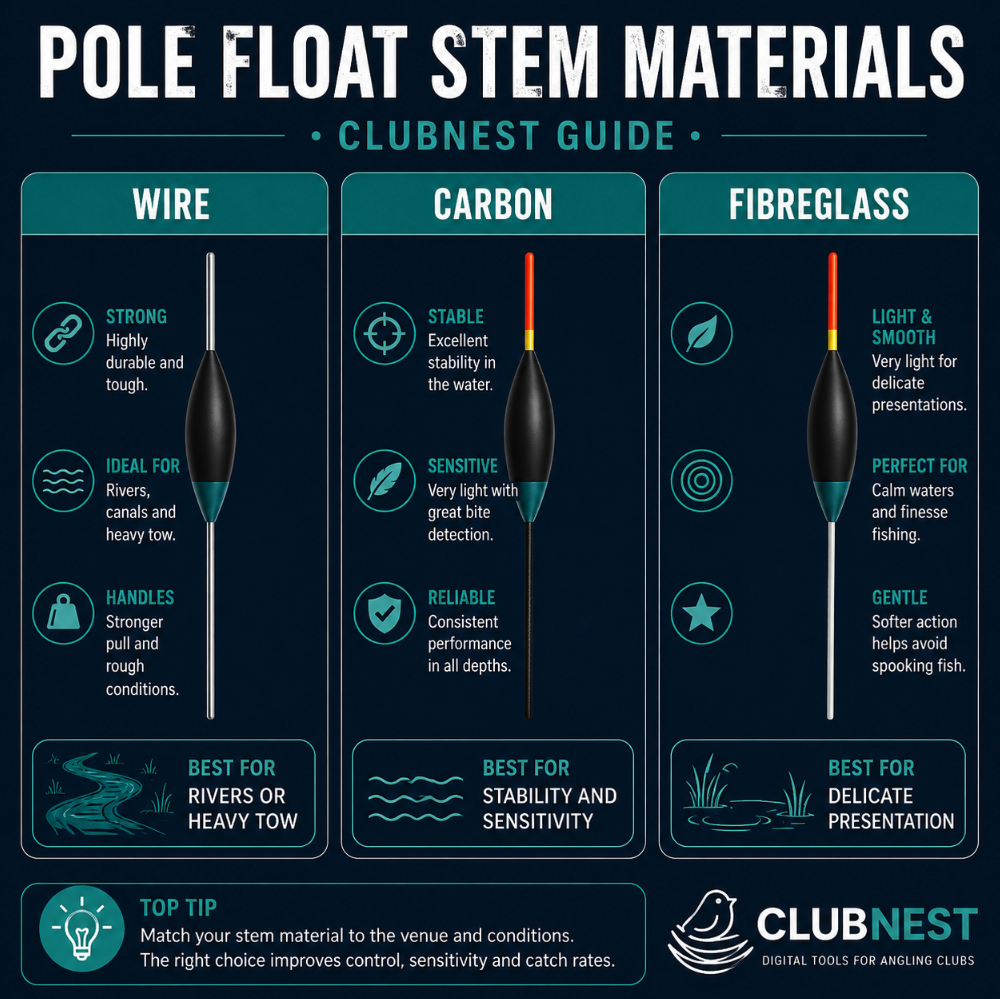
Choose stem material for stability vs finesse.
Bulk when you need speed and stability; strung-out for natural fall.
Always plumb depth and test your float before fishing.
Summary
Perfect float presentation isn’t about guesswork — it’s about balance. Understanding Stotz sizes, shot weights, and float materials lets you tailor every rig to the conditions in front of you.
With the charts, diagrams, and quick references in this guide, you can confidently adjust your setup to suit depth, tow, temperature, and target species — ensuring that every bite registers cleanly and every cast is under control.poster.png1.81 MB
Put This Into Practice
Ready to implement what you've learned? Create your free ClubNest account and get started today.